
Your graduation cap is your final canvas as a student, a chance to turn a simple piece of academic regalia into a statement about your journey. It's the perfect way to stand out in a sea of identical gowns, whether you're using a bit of paint, some carefully placed rhinestones, or an elaborate 3D design. The trick is to have a solid plan, the right supplies, and enough time to create something you’re proud of.
Your Guide to a Standout Graduation Cap

Think of graduation as more than just a ceremony—it’s the grand finale celebrating years of hard work, late-night study sessions, and incredible personal growth. Decorating your cap lets you express your personality, give a shout-out to your supporters, or hint at what’s next for you. It’s a modern tradition that puts a memorable, personal stamp on your academic career.
This trend has taken over graduation ceremonies everywhere. The desire to personalize graduation caps has become a global phenomenon, with countless students adding their own creative flair. From inspirational quotes and cultural symbols to decorations that reflect their field of study, graduates are making their mark. You can see just how creative people get by exploring popular graduation cap trends online.
The Four Core Stages of Cap Decoration
Breaking the project down into smaller, more manageable stages makes the whole process feel less overwhelming. Each step logically follows the next, guiding you from a rough idea to a finished masterpiece.
- Planning and Brainstorming: This is your creative starting line. Think about what matters most to you—your major, a favorite quote, a tribute to your family, or even an inside joke with friends.
- Gathering Materials: With a design in mind, you can shop for the right tools. You'll need a base (like cardstock or glitter paper), strong adhesives, and your decorative elements, whether that’s paint, gems, or faux flowers.
- Design and Creation: Here’s where the fun really begins! You'll bring your vision to life on a paper template first, which is a great way to work out the kinks before touching the actual cap.
- Final Assembly and Sealing: Once your design is perfect, you’ll attach it securely to the mortarboard. The final touch is adding a sealant to protect your work from any unexpected weather on the big day.
Your cap is the one part of the official regalia you can truly make your own. It’s your last chance to make a statement as a student, so don’t be afraid to be bold, sentimental, or humorous.
Graduation Cap Decoration at a Glance
To give you a bird's-eye view, here's a quick summary of what to focus on during each stage of your cap decorating project.
| Stage | Key Action | Pro Tip |
|---|---|---|
| 1. Planning | Finalize your design concept and sketch it out. | Create a Pinterest board to collect ideas and color palettes that inspire you. |
| 2. Materials | Purchase all necessary supplies like glue, paint, and embellishments. | Always buy slightly more than you think you need, especially for small items like rhinestones. |
| 3. Designing | Create your design on a cardstock template measured to your cap. | Practice lettering and spacing on scrap paper before applying it to your final template. |
| 4. Assembly | Securely attach your finished design to the mortarboard. | Use a strong adhesive like hot glue or E6000 for heavier 3D elements to ensure they stay put. |
Following these stages will help you stay organized and ensure your cap is ready to shine when you walk across that stage.
Getting Your Cap Ready and Gathering Supplies
Before you jump into the fun part, a little prep work goes a long way. Trust me, taking a few minutes to get organized now will save you from common headaches later—think crooked designs, peeling glitter, or a last-minute scramble for glue. You’re building the foundation for your masterpiece.
The absolute most important thing to do before a single drop of glue touches anything? Make a template. Whatever you do, don't start decorating directly on your graduation cap. One little slip-up could be permanent, and you need that cap looking perfect for the big day.
Measure Twice, Decorate Once: Creating Your Template
First things first, grab a ruler. Most standard mortarboards are square, usually around 9.25 to 9.5 inches per side. But sizes can vary slightly between manufacturers, so always measure your own cap just to be sure. You can see how yours stacks up against the norm in our guide to the standard graduation cap size.
Once you have the exact dimensions, trace them onto a sturdy piece of cardstock or glitter paper. This is going to be your canvas. Cut out the square and carefully mark the center point where the tassel button will go. This template is your creative playground—a risk-free zone to map out your design, test colors, and figure out your layout without ever touching the real cap.
Pro Tip: Make two templates. Use the first one for all your rough drafts and brainstorming. Once you've perfected the design, recreate it on the second template. This way, you have a pristine final version ready to go.
Building Your Decoration Toolkit
Okay, template's ready. Now it’s time to assemble your creative arsenal. What you'll need really depends on your vision, but a few items are non-negotiable for pretty much any decorated cap project.
The Must-Haves for Any Design:
- Ruler or Measuring Tape: For getting those measurements just right.
- Pencil and Eraser: To sketch out your ideas on the template first.
- Scissors or a Craft Knife: A sharp craft knife paired with a cutting mat will give you much cleaner lines than scissors, especially if you're cutting out detailed shapes or letters.
- Your Cardstock Template: The star of the show!
With these basics covered, you can start gathering the fun stuff—the paints, glitter, and other embellishments that will bring your design to life.
Picking the Right Materials and Adhesives
The materials you choose are what will give your cap its personality. If you're going for a sleek, flat design, acrylic paint or high-quality glitter cardstock works beautifully. A small tip for painters: apply a thin coat of gesso or primer to your template before you start. It really makes the colors pop and helps the paint stick better.
Now for the most critical choice you'll make: the glue. The right adhesive is the difference between a cap that looks amazing all day and a design that falls apart halfway through the ceremony.
| Adhesive Type | Best For | Pros | Cons |
|---|---|---|---|
| Hot Glue Gun | 3D objects, faux flowers, big embellishments | Gives a strong, almost instant bond. Perfect for adding dimension. | Can get stringy and messy. Might be too hot for delicate items. |
| Craft Glue (e.g., E6000) | Rhinestones, gems, metal charms, fabric | Creates a super-strong, permanent, waterproof bond. Dries clear. | Has strong fumes (use in a ventilated area!). Takes time to dry. |
| Spray Adhesive | Attaching your paper template to the cap | Provides smooth, even coverage with no bumps or wrinkles. | Can be messy. Definitely an "outside" or well-ventilated job. |
| Glue Dots or Tacky Glue | Lightweight paper cutouts, photos, sequins | Simple to use and much less messy than liquid glues. | Lacks the strength needed for heavier 3D elements. |
If you're planning to add some sparkle with rhinestones, choosing the right glue is essential for making sure they stay put. For the best results, look for a specialized glue for rhinestones on fabric. This type of adhesive is made to bond gems securely without clouding their shine or damaging the cap's fabric, ensuring every little detail sparkles just right.
Time to Create: Bringing Your Cap Design to Life
You've done the prep work, your supplies are laid out, and now for the fun part! This is where your ideas jump off the mood board and onto the mortarboard. Whether you’re going for a subtle, classy look or a full-on spectacle that can be seen from the back row, the right technique is everything.
Let's walk through a few of the most popular approaches I've seen over the years. Each one has its own quirks and tricks to get it just right.
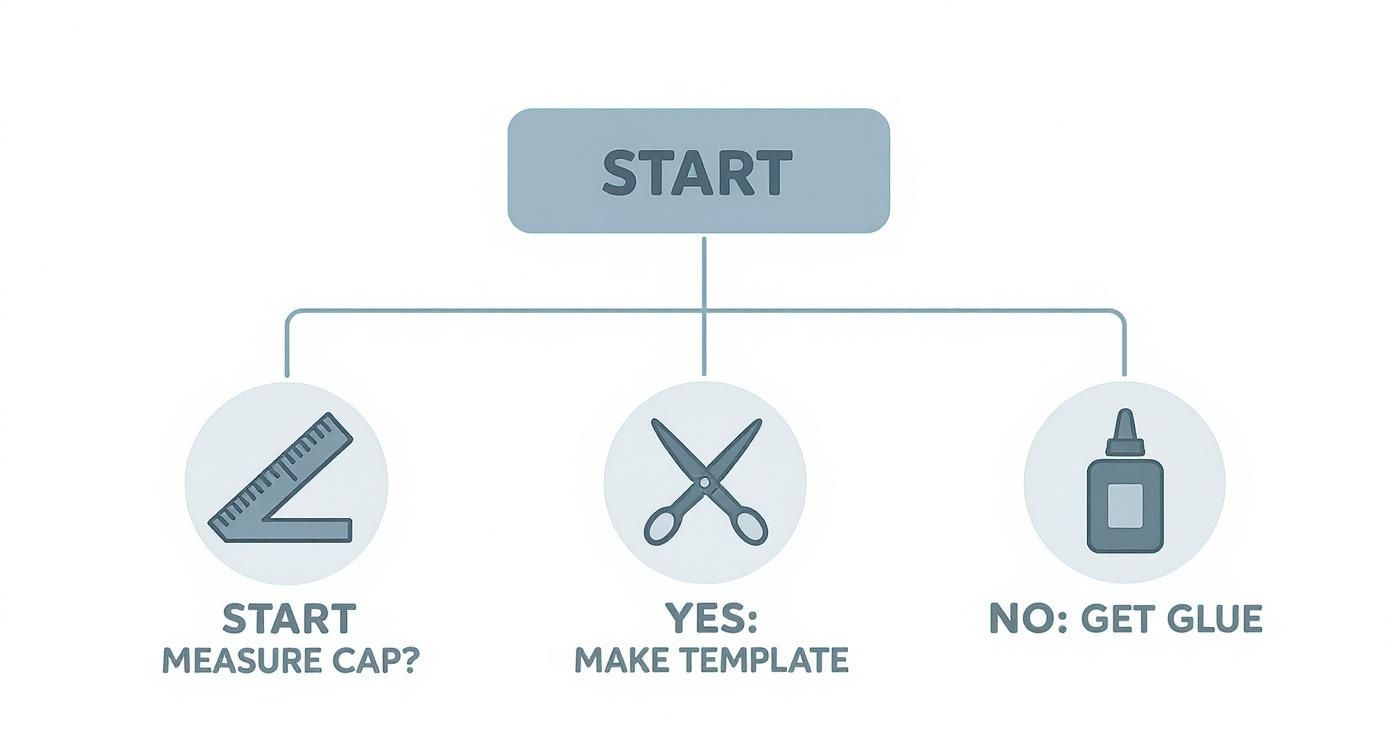
This little map just shows that whether you start by making a precise template or just grabbing the glue, you're on the right path to a great-looking cap.
Before you commit, it helps to think about what style truly fits your personality and how much time you've got on your hands.
Choosing Your Cap Decoration Style
| Decoration Style | Best For | Materials Needed | Difficulty Level |
|---|---|---|---|
| Paint & Stencils | Clean lettering, classic quotes, minimalist designs. | Acrylic paint pens, stencils, painter's tape. | Beginner |
| Rhinestones & Glitter | Maximum sparkle, glamorous gradients, and intricate patterns. | Flat-back rhinestones, E6000 or Gem-Tac glue, wax pencil. | Intermediate |
| 3D Embellishments | Thematic designs (e.g., major-specific), bold textures, and a "wow" factor. | Faux flowers, hot glue gun, charms, wire cutters. | Intermediate to Advanced |
This table is just a quick guide. The most important thing is to pick the style that gets you excited to start creating!
H3: The Minimalist: Clean and Classy with Paint and Stencils
Sometimes, the most powerful statement is a simple one. If you’re a fan of clean lines and impactful quotes, this is your lane. It’s an elegant approach that looks incredibly polished without requiring a mountain of supplies or advanced skills.
Here’s what you’ll need to pull it off:
- Acrylic Paint Pens: These are a game-changer. They give you so much more control than a brush, which is key for crisp lettering. White, gold, or silver pens always pop against a standard black cap.
- Alphabet Stencils: Unless you have professional-grade calligraphy skills, stencils are your secret weapon for perfectly uniform, professional-looking text.
- Painter's Tape: Use this to lock your stencils in place so they don't slide around. It's also great for creating sharp, straight borders if you want to frame your quote.
First, play around with the stencil layout on your cardstock template. A light pencil tracing helps you nail the spacing and alignment before you commit. Once you love how it looks, carefully go over your pencil lines with the paint pen. Let it dry completely, and don't be afraid to add a second coat for a bolder, more opaque finish.
A Pro Tip From Experience: If you find your paint is bleeding under the stencil, you’re probably pressing too hard on the pen. The trick is to use a light, steady hand. You can always build up the color with a second thin layer. A Q-tip dipped in a tiny bit of water can be a lifesaver for cleaning up little smudges while the paint is still wet.
The Head-Turner: All Out with Rhinestones and Glitter
If your philosophy is "go big or go home," then a blinged-out cap is practically a requirement. This style is all about catching the light and dazzling the crowd. It definitely requires some patience and a steady hand, but the jaw-dropping result is so worth the effort.
To get that perfect sparkle, grab these essentials:
- Flat-Back Rhinestones: They come in a rainbow of colors and sizes. My favorite trick is to mix different sizes—it adds a ton of depth and texture to the design.
- Gem-Tac or E6000 Glue: Don't use regular craft glue! You need an industrial-strength adhesive that dries clear and creates a permanent bond. The last thing you want is a trail of rhinestones on the graduation stage.
- Wax Pencil or Jewel Picker: This little tool makes picking up and placing tiny rhinestones about a million times easier than fumbling with tweezers.
- Fine-Tip Glitter Glue: This is great for adding delicate, sparkling accents or even for writing out words in pure glitter.
A fantastic technique, especially if you're new to this, is the rhinestone gradient. Start by clustering larger gems densely in one corner, then gradually space them out and switch to smaller stones as you move across the cap. It creates a gorgeous, cascading effect. Always work in small sections—apply a thin layer of glue, then place your rhinestones. This keeps the glue from drying before you can set the gems.
It's no surprise this trend is taking off. The global graduation cap and gown market is on track to hit $3.3 billion by 2032, and a huge part of that growth is driven by the demand for personalization. You can read more about the booming graduation accessories market to see just how popular this has become.
The Artist: Stand-Out 3D Embellishments
Want a design that literally pops? Adding 3D elements like silk flowers, paper butterflies, or even tiny themed objects turns your mortarboard into a true work of art. This is such a cool way to give a nod to your major—I've seen beautiful paper butterflies for biology grads and intricate gears for engineers.
For a design with dimension, your toolkit should have:
- Faux Flowers or Other 3D Objects: Silk flowers are incredibly lightweight and come in every color you can imagine. You can also find cool charms, laser-cut wood shapes, or miniature models that tie into your theme.
- Hot Glue Gun: When you're working with larger or heavier items, hot glue is non-negotiable. It provides a strong, instant bond that craft glue just can't compete with.
- Wire Cutters: An absolute must for trimming the bulky plastic stems off faux flowers. This lets them lie flat against the cap for a much cleaner look.
When you're arranging flowers, start with your biggest, most eye-catching blooms to create focal points. Then, fill in the empty spaces with smaller flowers, buds, and leaves. A common mistake is to go overboard with the hot glue, leaving you with ugly, visible clumps. Just a small dot of glue on the base of the object is all you need. Press it firmly onto your template and hold it for a few seconds to let it set.
No matter which style you choose, remember to do a full practice run on your cardstock template first. Once you've perfected the design there, you can confidently transfer it to your real cap. A stunning cap is the perfect final touch to your graduation day look, especially when it coordinates with your gown and stole. Whether it's for a high school graduation or a university ceremony, a personalized cap makes the moment yours. And for those earning advanced degrees, these creative touches are a fantastic way to celebrate alongside your distinguished masters and doctoral regalia.
Mastering Lettering and Quotes on Your Mortarboard
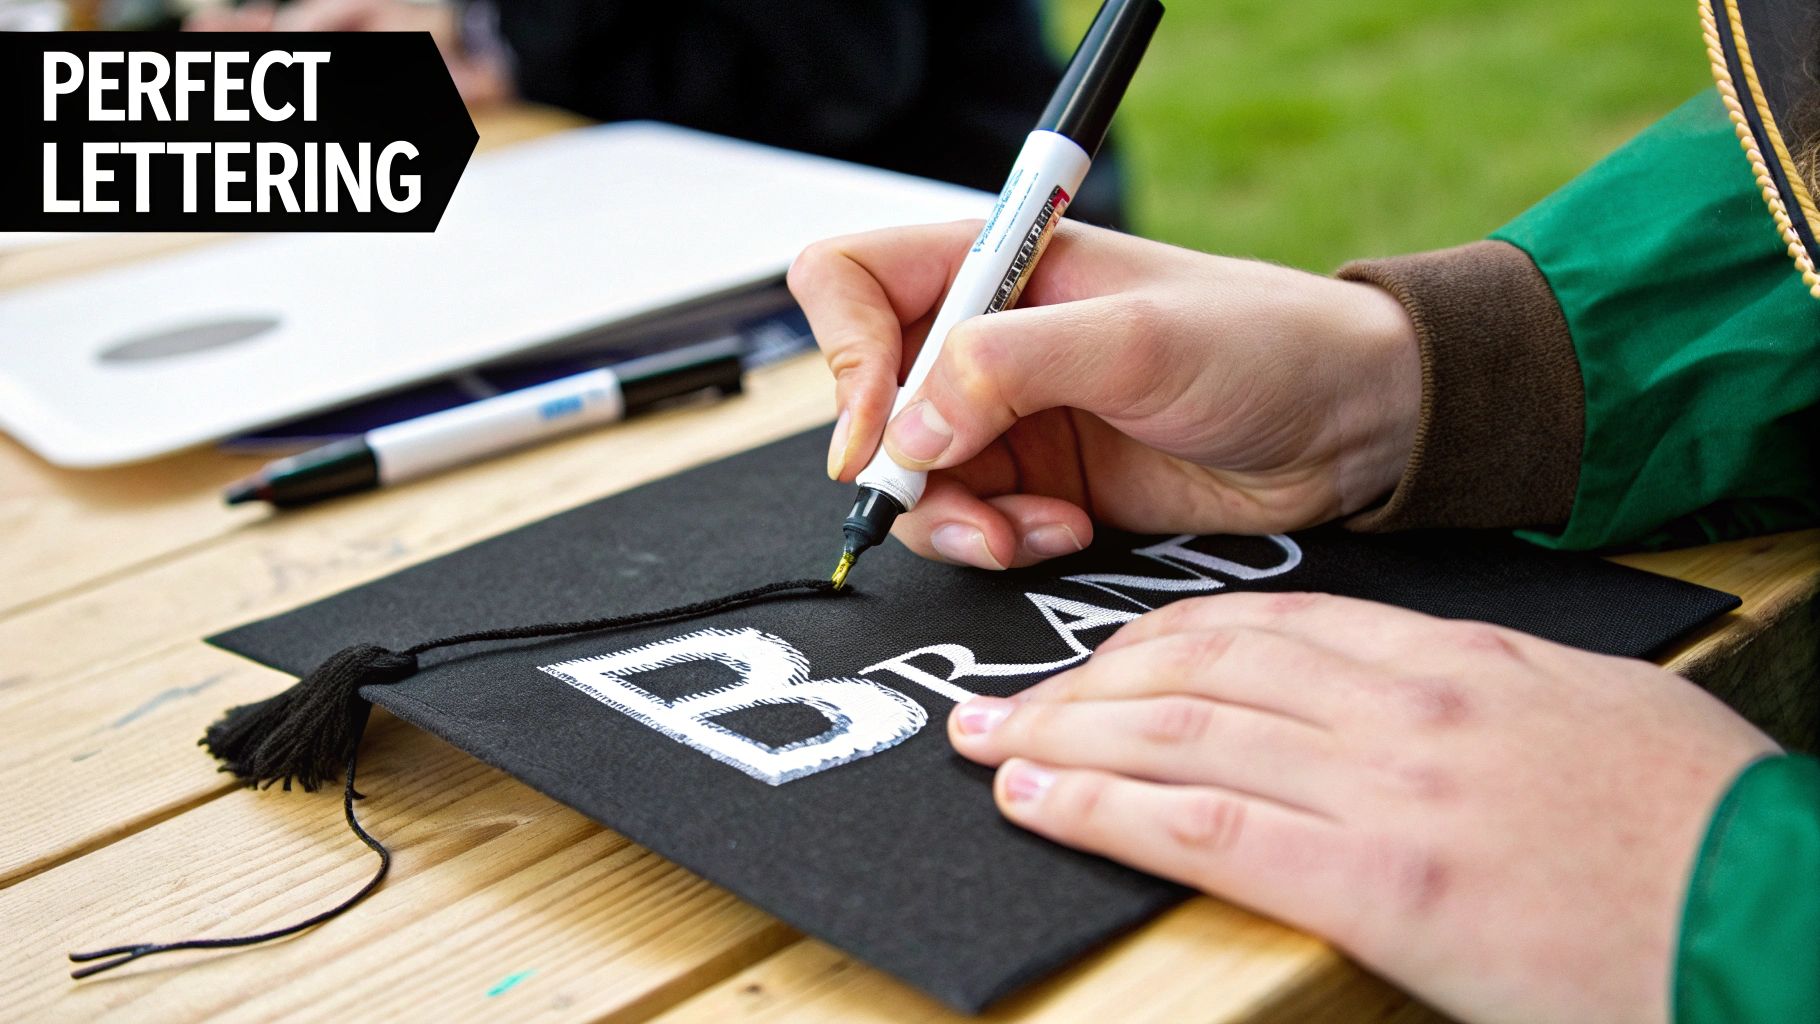
Sometimes, the most powerful part of a graduation cap isn't a complex design, but the words you choose. A witty quote, a simple "Thanks Mom & Dad," or a bold statement about your future can turn your mortarboard into a personal billboard that gets noticed.
But let's be honest—getting crisp, clean letters on that fuzzy fabric surface takes a bit of strategy. Whether you're going for elegant calligraphy or a big, graphic statement, your technique is what will make it look amazing instead of amateur. This is your chance to let your personality shine through.
Choosing the Perfect Quote and Font
Before you even touch a paint pen, take a moment to find a quote that actually means something to you. What captures your journey? Think about your major, a funny inside joke, or your big dream for the future. The best caps are the ones that feel authentic.
Once you have your words, it’s all about the font. The font sets the entire mood of your cap.
- Serif Fonts (like Times New Roman): With their little "feet" on each letter, serif fonts feel classic, academic, and timeless. They’re a great fit for more traditional or formal quotes.
- Sans-Serif Fonts (like Arial or Helvetica): These are your go-to for modern, bold statements. Their clean lines make them super readable from way up in the stands.
- Script Fonts (like cursive): Script fonts are beautiful and have a personal, hand-drawn feel. Just be careful—if they're too frilly or small, they can become hard to read. Stick to shorter phrases where style is the main goal.
A quick pro-tip: readability is everything. A clever quote is completely lost if no one can actually read it from more than a foot away. Always test it by looking at it from a distance.
If you want to dive a little deeper into typography, you can find some great tips on selecting fonts for your cap's text that explain how to pair different styles for maximum impact.
Techniques for Flawless Lettering
Alright, you’ve got your quote and font. Now it’s time to get that design onto your cap topper. There are a few tried-and-true methods to get sharp, professional-looking text, no matter your skill level.
The Tracing and Painting Method
This is my favorite low-tech option because it gives you total control and a really nice hand-painted finish.
- Print It Out: Type your quote in your chosen font and print it to scale. Make sure it fits perfectly inside your template dimensions.
- Make a DIY Transfer: Flip the paper over and scribble all over the back with a soft graphite pencil. If you’re working on a dark background, use white chalk instead.
- Trace the Letters: Place the paper (graphite-side down) onto your cardstock topper. Firmly trace the outline of each letter with a pen. This will transfer a perfect, faint outline onto your cardstock.
- Paint Away: Now for the fun part. Grab a fine-tipped acrylic paint pen or a tiny paintbrush and carefully fill in the lines. Take your time—slow and steady wins this race.
Using a Vinyl Cutting Machine
If you or a friend have a Cricut or Silhouette machine, you can get incredibly clean, professional-looking letters with almost no effort.
- Design and Cut: Set up your text in the machine's software and cut it from adhesive vinyl or heat transfer vinyl (HTV).
- Apply Adhesive Vinyl: For regular sticker vinyl, use transfer tape to lift the whole quote at once and apply it smoothly to your cardstock base. It’s fast, easy, and looks perfect.
- Use Iron-On Vinyl (HTV): For a finish that looks like it’s printed right on the fabric, iron-on is the way to go. Place the HTV on your fabric-covered topper, cover it with a Teflon sheet, and press with a mini craft iron.
Stencils for Super-Easy Lettering
Don’t want to mess with tracing or tech? Stencils are your best friend. They guarantee uniform letters every single time. Just tape the stencil down with painter's tape and use a sponge brush to dab the paint on. Dabbing, not brushing, is the secret to preventing paint from bleeding under the edges.
Final Touches for a Flawless Ceremony Day
Your design is done, the glitter is placed, and it looks incredible. Now for the crucial last steps to make sure your creation not only survives the big day but also plays by your school's rules. This is what takes a cap decoration from just "done" to truly ceremony-ready.
Think of this as your pre-flight check before you walk across that stage. You've spent time and effort creating something that tells your story, and these last few details will protect it and ensure it gets the attention it deserves.
Sealing Your Design for Durability
First things first: let's protect that artwork. Graduation ceremonies can be chaotic. You might be dealing with glaring sun, an unexpected spring shower, or just the jostle of a thousand other excited grads. A good sealant is your design's best friend.
- For paint and markers: A light mist of clear acrylic sealer (like Mod Podge spray) works wonders. It creates a protective shield that stops paint from smudging and keeps colors from bleeding if things get a little damp.
- For glitter and rhinestones: That same spray sealant is a lifesaver for locking down loose glitter. Trust me, you don't want to be the person leaving a pixie-dust trail across the stage. It also adds an extra layer of security for your gems.
- For 3D elements: You obviously can't spray sealant on real flowers, but it's perfect for any painted or paper-based pieces of your 3D design.
Pro Tip: Always spray your sealant in a well-ventilated space—outdoors is best. Hold the can about 10-12 inches away and apply a thin, even coat. Let it dry completely before you even think about the next step. One light coat is usually better than a single heavy one.
Understanding School Rules and Ceremony Etiquette
Before you break out the hot glue, take a moment to double-check your school’s policy on cap decorations. While most colleges and high schools love seeing students get creative, some have specific guidelines you need to follow. The last thing you want is to be told you can't wear your cap minutes before the ceremony begins.
Check the commencement page on your school’s website for any rules about height restrictions (for 3D designs), flashing lights, or anything that might be considered inappropriate. A quick search now can save you a major headache later.
It's also worth knowing how to position the cap itself. The mortarboard should sit flat, with one point centered on your forehead—not tilted back like a hat. For a full rundown, check out our guide on how to wear a graduation cap correctly. It'll make sure your design is perfectly displayed.
Attaching Your Topper to the Mortarboard
Okay, your design is sealed and you've gotten the green light on the rules. It's go-time. You need to attach your decorated cardstock to the actual mortarboard securely.
- Make room for the tassel. Gently poke a small hole through the center of your decorated topper so it can fit over the button on the mortarboard.
- Pick your adhesive. Hot glue, strong fabric glue, or even full-sheet double-sided adhesive will give you a permanent, sturdy bond. If you want a less permanent option, removable glue dots are a good choice.
- Line it up and press. Apply the adhesive to the back of your topper, carefully align it with the edges of the mortarboard, and press down firmly from the center out to the corners.
As you put these final touches on your cap, it’s interesting to see how the whole industry is evolving. With families spending billions on graduation gear, there's a growing demand for eco-friendly options. In response, some manufacturers are now making caps and gowns from fabrics derived from recycled plastic bottles, reflecting a bigger shift toward sustainability.
Got Questions About Decorating Your Cap?
Jumping into a creative project like this always sparks a few questions. From the nitty-gritty details about what glue to use to the bigger concern of not breaking any school rules, it’s smart to get a few things cleared up before you start gluing.
Let's walk through some of the most common things graduates wonder about when they decide to decorate their graduation cap. Getting these details ironed out first means you can have a stress-free creative session and just focus on the fun part.
What’s the Best Glue for a Graduation Cap?
This is the number one question I hear, and for good reason—the wrong glue can turn your masterpiece into a mess. The best adhesive really depends on what you’re trying to stick on your cap.
- For paper and cardstock: A good spray adhesive is your best bet for attaching your main topper. It gives you a smooth, even coat without the wrinkles you might get from a glue stick or liquid glue.
- For rhinestones and gems: Whatever you do, don't use a hot glue gun for these tiny details! It gets messy fast. Instead, grab a specialty craft glue like E6000 or Gem-Tac. They dry completely clear and create a permanent, rock-solid bond that won't pop off.
- For 3D objects and flowers: Now’s the time to break out the hot glue gun. It provides that strong, instant hold you need for bulkier items like faux flowers, big bows, or other dimensional pieces.
Can I Decorate a Rented Cap?
This is a huge one. If your cap and gown are rentals, you absolutely cannot permanently alter them in any way. That means painting directly on the mortarboard or using super-strong glue is completely off-limits.
But don't worry, you can still join in on the tradition! The cardstock topper method we talked about earlier is the perfect solution. You’ll create your entire design on that separate piece of cardstock, then attach it to the cap with something temporary and non-damaging, like removable glue dots or double-sided tape. After the ceremony, you just peel it right off, leaving the cap in perfect shape for its return.
How Do I Keep My Design from Falling Apart?
You've poured your heart into this design, and the last thing you want is for it to fall apart before you even cross the stage. Durability really comes down to two key things: using strong adhesives and adding a protective sealant.
Like we just covered, using the right glue for each material is non-negotiable. Don’t expect craft glue to hold a heavy 3D object—it just won’t work. Once your design is finished and completely dry, give it a light misting with a clear acrylic sealer spray (Mod Podge makes a great one). This locks everything in, stops glitter from shedding everywhere, protects paint from smudging, and even adds a bit of water resistance for that unexpected drizzle.
Don't forget the tassel! While the mortarboard gets all the attention, the tassel is a crucial part of your regalia. Just make sure your design doesn't get in the way of its movement. For a refresher on the ceremony's most important accessory, check out our guide on what side the tassel goes on.
Will My School Even Allow a Decorated Cap?
Most schools love seeing students get creative with this tradition, but some have pretty strict rules. It's always, always better to check first. Before you even buy your supplies, head over to your school's website and look for the commencement or graduation information page.
Keep an eye out for specific guidelines on things like:
- Height restrictions for any 3D elements.
- Bans on lights, sounds, or offensive language.
- Anything that might block the view of the person sitting behind you.
A quick five-minute check can save you from the major disappointment of being told to take your cap off on the big day. If you can't find anything online, a quick email to the student affairs or commencement office will get you a clear answer.
Ready to find the perfect canvas for your creation? At Gradshop, we have everything you need to celebrate in style, from high-quality high school caps & gowns to a huge selection of custom stoles and distinguished masters and doctoral regalia. Let’s get you ready for your big day