
It might seem like a tiny detail, but getting your tassel on your cap correctly is the final touch that prepares you for one of academic life's biggest moments. It’s a simple action, really: just find the button in the center of your mortarboard and slip the tassel's loop right over it. With that one move, you're connected to a tradition that's centuries old.
Understanding Your Graduation Regalia
Before you pop that tassel on, let’s quickly get familiar with the gear. This isn't just about putting a string on a hat; it’s about preparing a key piece of your academic regalia for its big debut.
The whole process hinges on a small button stitched right into the middle of your mortarboard. Modern caps feature a specially reinforced button for this very reason. It's built to hold a tassel, which can weigh up to 20 grams, securely in place through all the handshakes, photos, and celebrations. You can discover more insights about the graduation cap market on openpr.com.
Key Takeaway: That little button in the center of your cap? It’s reinforced for a reason. It's designed to keep your tassel exactly where it should be, from the moment you march in until you joyfully toss your cap in the air.
Once the tassel is attached, you'll need to know which side it should hang on. Getting the placement right is a huge part of the tradition. For all the details, check out our complete guide on what side the tassel goes on.
Anatomy of Your Graduation Cap and Tassel
To make things even clearer, here’s a quick look at the parts you'll be working with. Think of it as a quick meet-and-greet with your graduation gear.
| Component | Description | Primary Function |
|---|---|---|
| Mortarboard | The flat, square top part of a traditional graduation cap. | Provides the structure for the entire headpiece. |
| Button | The small, raised knob located at the very center of the mortarboard. | Serves as the anchor point for the tassel. |
| Tassel Loop | The circle of cord at the top end of the tassel strands. | Designed to slip over and secure onto the button. |
| Year Charm | The small metal charm displaying the graduation year. | Signifies the year your academic achievement was completed. |
Knowing these simple parts makes the whole process foolproof, ensuring your cap and tassel look perfect for your big day.
Securing Your Tassel on a Standard Mortarboard
Attaching your tassel to a classic mortarboard is pretty simple, but a few quick checks will make sure it looks great and stays put all day. First things first, find the small button right in the center of your cap and give it a gentle wiggle. It should feel solid, ready to hold your tassel through the entire ceremony and all the photos that follow.
Once you’re sure the button is secure, grab the tassel by its looped cord. Just stretch the loop a little and slide it right over the button. Make sure the loop lies flat against the cap—if it’s twisted or bunched up, it won't hang quite right. This tiny adjustment makes a surprisingly big difference.
Getting the Placement Just Right
With the loop in place, let the tassel and its shiny year charm hang freely. You'll want to gently smooth out any tangled strands so it drapes nicely over the side of your cap.
For high school and undergraduate ceremonies in the United States, there’s a long-standing tradition to follow. You'll begin the ceremony with your tassel on the right side of your cap. This position shows you're a candidate for graduation.
The "turning of the tassel" is a huge symbolic moment. At a specific point in the ceremony, you’ll be told to move the tassel from the right to the left. This simple action signifies your official shift from student to graduate.
It really is that easy. This visual gives you a quick look at the core steps.
![]()
As you can see, it breaks down to just three actions: locate the cap's button, find the tassel's loop, and secure it in place.
Ensuring a Secure Fit for the Big Day
But what if that button feels loose? You definitely don’t want any wardrobe malfunctions on graduation day. If you're in a pinch, a small dab of clear fabric glue under the button can work as a temporary fix.
For a permanent solution that will give you total peace of mind, a few quick stitches with a needle and thread are your best bet. If you're new to sewing, learning how to sew on trim like a pro can offer some surprisingly handy techniques for small fixes like this.
Don't leave this check until the morning of the ceremony. A quick look at your gear a few days ahead of time gives you plenty of time to fix any issues. And if you realize your cap is damaged or you've misplaced your tassel, don't panic. Gradshop has a huge variety of replacement caps and gowns and individual tassels to make sure you look your best.
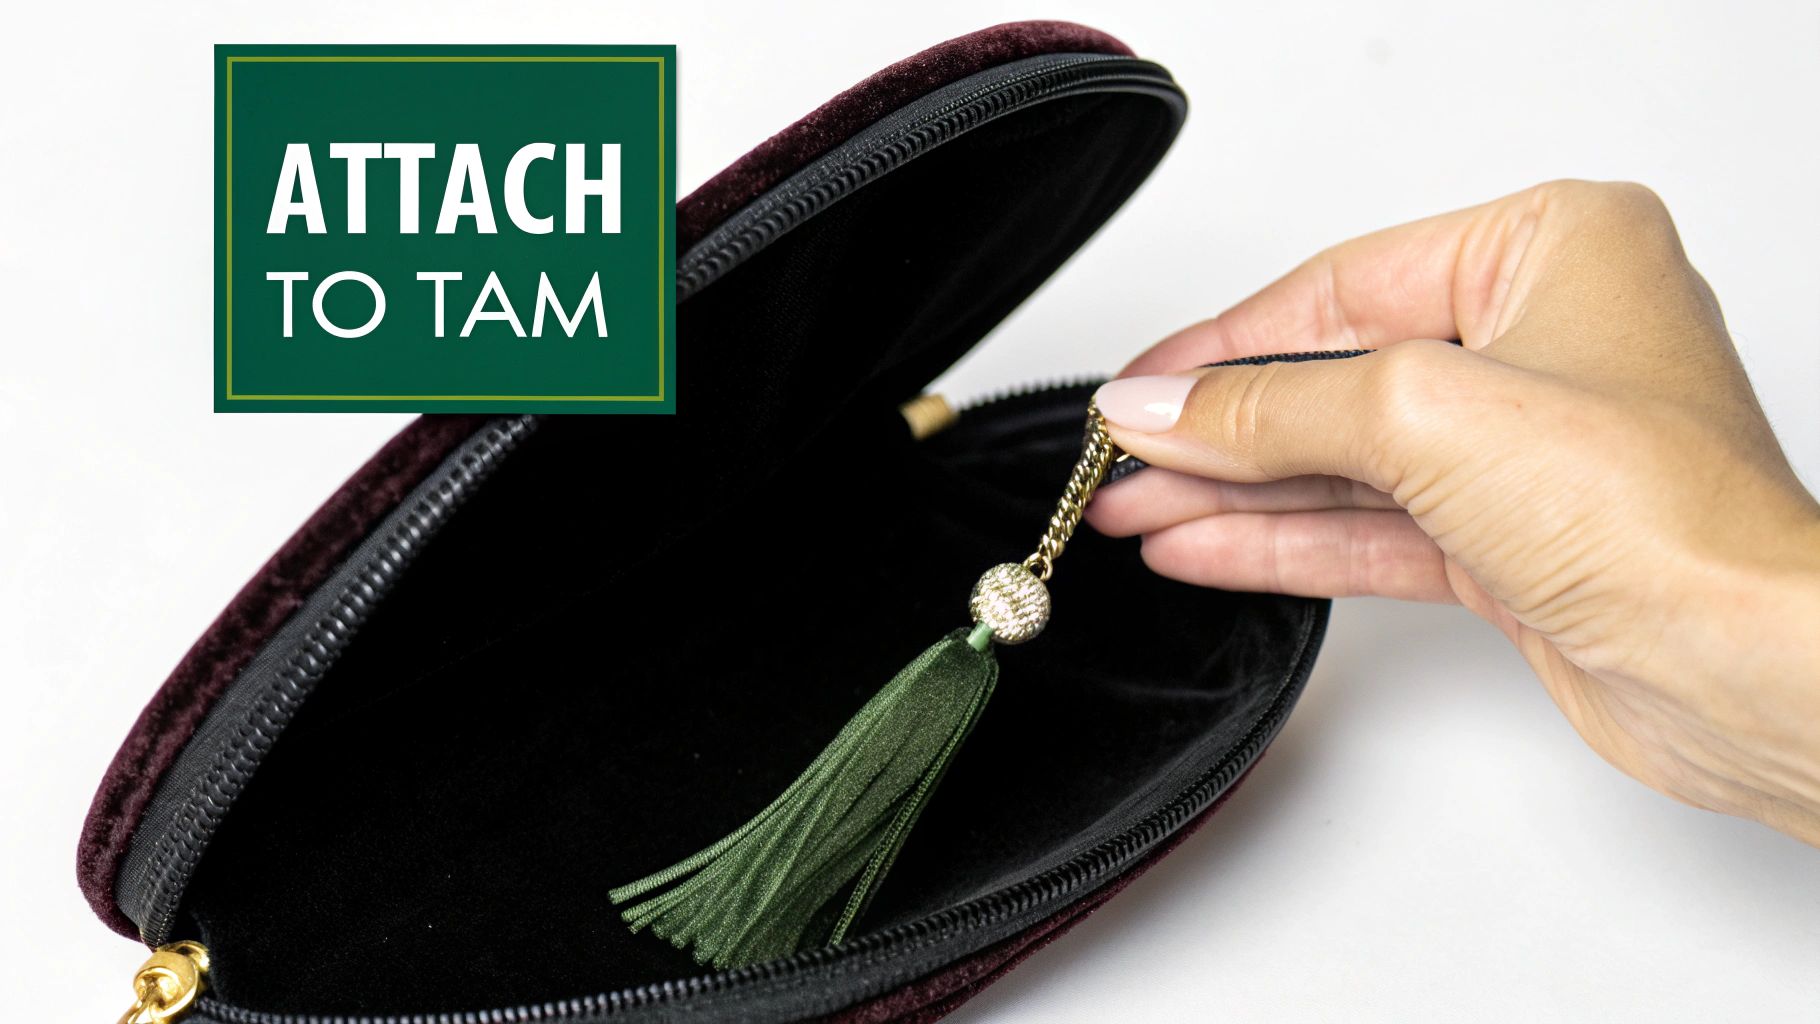
Attaching Tassels to Master’s and Doctoral Tams
Once you reach the master's or doctoral level, you'll likely trade the traditional mortarboard for a soft, velvet tam. These caps have a more distinguished look, but they also require a slightly different approach for attaching your tassel. Forget looking for that familiar button on top—tams are designed differently.
So, where does the tassel go? You’ll need to find a more discreet attachment point. Most tams have a small, sewn-in string loop or a tiny metal hook right at the center, but on the inside. The first thing you should do is flip the tam over and take a close look at the interior lining to find it.
Finding the Attachment Point
It doesn't matter if your tam has four, six, or eight sides—the attachment method is the same. The design is clever, keeping the exterior of the tam looking clean and elegant while still giving you a secure place for the tassel inside.
Here’s what to look for:
- String Loop: If you find a small loop of string, just thread the main cord of your tassel through it. A simple slipknot or a lark’s head knot works perfectly to hold it in place. Give it a gentle tug to make sure it's secure before you put it on.
- Metal Hook: Some tams come with a small metal hook instead. This is even more straightforward. Simply slide the tassel's loop right onto the hook, and you're all set.
This internal attachment ensures your tassel—which is often thicker and more decorative for postgraduate degrees—hangs just right without messing up the tam's classic shape.
Pro Tip: When you're tying the knot, make it snug but not impossible to undo. You’ll thank yourself later when you want to save your tam and tassel as keepsakes from the big day.
Getting familiar with your specific regalia is the key to looking your best. For a deeper dive into these unique caps, check out our guide on the tam graduation cap. Once it's attached, your tassel will drape gracefully down the side, perfectly completing your academic look.
And if you find yourself needing any part of your commencement outfit, from a replacement tassel to a full set of master's and doctoral regalia, Gradshop has a complete selection to make sure you're ready for graduation.
Troubleshooting Common Tassel Problems
Even with perfect planning, little things can go wrong on graduation day. It happens. A sudden windy forecast or a cap that isn't cooperating can cause a moment of panic, but don't let it. Knowing a few quick fixes will keep a minor wardrobe issue from souring your celebration.
Let’s start with the most common culprit: a loose button. If the button on your mortarboard feels wobbly, you’ve got a couple of solid options. For a last-minute fix right before you line up, a sturdy safety pin is a lifesaver. Just push the pin up through the center of the cap from the inside. This creates a secure little bar on top to loop your tassel over. Problem solved.

Handling Missing Buttons and Windy Days
But what if the button is gone completely? The safety pin trick still works like a charm. If you have more time, though, sewing on a small, flat button is the most reliable long-term solution. And if it's the tassel itself that's frayed or lost, don't worry—Gradshop has a huge selection of replacement tassels to match your school colors perfectly.
Outdoor ceremonies are beautiful, but they can also be windy. There’s nothing more annoying than your tassel whipping into your face while you’re trying to walk across the stage or smile for a photo.
Pro Tip: A single bobby pin is the secret weapon here. Discreetly slide it through the main loop of the tassel and clip it down tight to the fabric edge of your cap. This simple move anchors the tassel in place without anyone ever noticing.
The way your tassel attaches matters, too. Most caps feature the classic sewn-on button, which accounts for nearly 75% of the market because it's so simple and effective. The other 25% includes various designs for detachable tassels, sometimes with metal clips. You can dive deeper into these headwear market trends if you're curious.
At the end of the day, a little preparation makes all the difference. And if a quick fix isn't enough, our complete collection of caps and gowns will ensure you look and feel your best for the big moment.
Taking Care of Your Tassel and Making It Your Own
Your tassel is a huge part of your graduation day look, but it's also a keepsake you'll have for years. You definitely want it looking sharp for photos and for its future spot in your memory box.
If your tassel looks a little bent or creased right out of the package—which is totally normal—don't worry. A little steam is all it takes. You can carefully hold it over a steaming mug of hot water for a few moments, or use a garment steamer on a low setting from a foot away. Just be sure the strands don't actually get wet.
Once the big day is over, you'll want to protect that memento. A shadow box is a classic choice, but even keeping it safe in a memory book will keep the delicate strands from getting tangled or dusty over the years.
Add a Personal Touch to Your Regalia
While the tassel itself is all about tradition, there's still room to showcase your personality. A great way to do this is with custom year charms that go beyond the standard issue.
Another meaningful option is to wear a stole of gratitude. This is a beautiful way to honor a parent, mentor, or someone who supported you on your academic journey. These additions don’t break any rules; they just add a layer of personal story to your official regalia.
A simple customization like a unique charm or a meaningful stole lets you celebrate your own journey while still honoring the tradition of academic dress. It makes the day feel even more special.
Whether you're looking to add that extra flair or simply need a fresh tassel, it helps to know where to order graduation tassels that match your school’s colors perfectly. It’s these little details that pull your entire look together and truly celebrate your achievement.
Answering Your Top Tassel Questions
Even with a perfect plan, a few little things can crop up on graduation day. Let's tackle some of the most common questions I hear so you can walk across that stage without a single worry.
Which Side Does the Tassel Go On Before I Graduate?
For almost every high school and undergraduate ceremony in the U.S., you'll start with the tassel on the right side. This is a long-held tradition signifying you're a candidate about to receive your degree.
The big moment comes during the ceremony when you're instructed to flip it over to the left side. That simple motion—the "turning of the tassel"—is the symbolic act that officially marks your transition from student to graduate.
What if My Graduation Cap Doesn't Have a Button?
It happens! If you find your cap is missing that little button in the middle, don't sweat it. The quickest fix is a simple safety pin.
Just poke the pin up through the very center of the mortarboard from the inside. This creates a small metal bar on top that you can easily loop your tassel's charm onto. If you've got a bit more time, sewing a small, flat button in the center is a great, extra-secure option.
Can I Wear More Than One Tassel?
This is a great question, especially for students involved in honor societies or multiple clubs. For the ceremony itself, the rule of thumb is to stick with the single, official tassel your school provides. It’s all about maintaining a look of uniformity and tradition during the formal proceedings.
However, once the ceremony is over, it's your time to shine! Feel free to attach all your other tassels for photos to proudly display every single one of your accomplishments.
The core tradition is about uniformity and symbolism during the ceremony itself. For personal photos, showcasing all your achievements with multiple tassels is a great way to capture the moment.
To make sure your whole look comes together, you'll want an outfit that feels great under your gown. Discover more college graduation outfit ideas that will help you look and feel your best.
Whether you’re looking for a replacement tassel, a full set of academic robes, or a custom stole to celebrate your journey, Gradshop has you covered. Check out our collections of high school caps and gowns and our distinguished master’s and doctoral regalia today.